Important: The Apex installer automatically adds Libra items to
the ADMIN menu, except for the Batch Recordation Report. This report is made available to all users if Libra
was installed using a Gen3Data.mdb file and was earlier configured to utilize the Batch recordation
printout. (as detailed in the Libra Connected Installation section).
If you plan to use the ADMIN menu for all users, you can skip this step.
To add
Libra items to a custom Apex user menu, follow these steps:
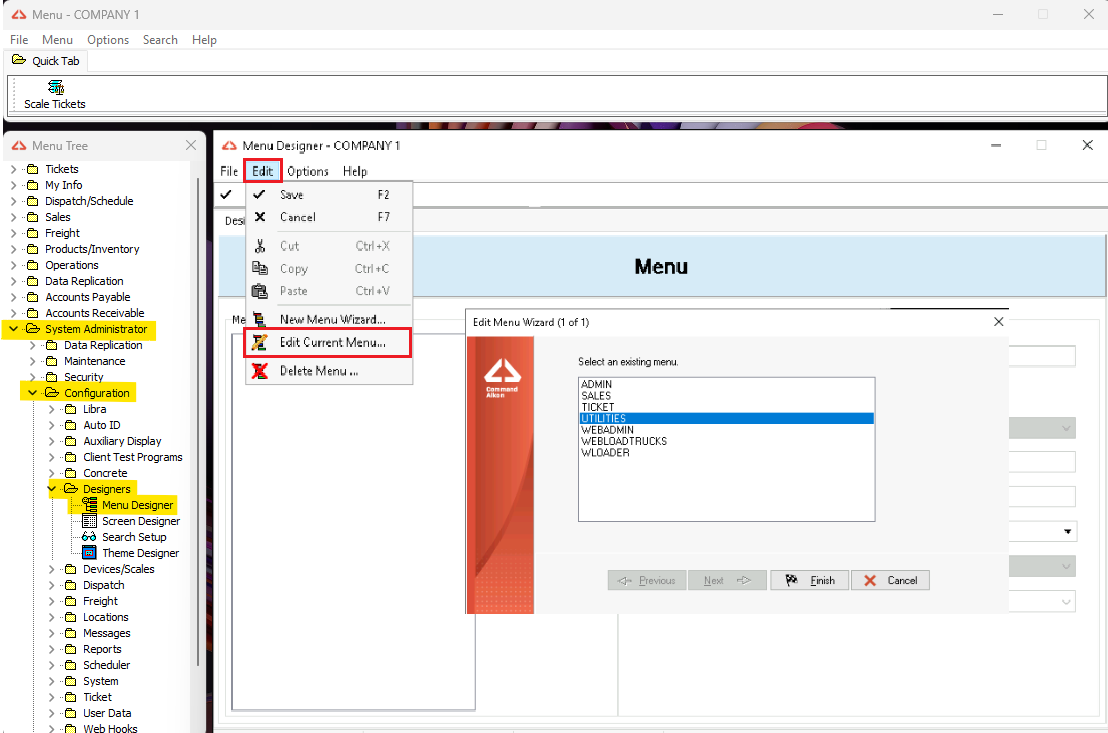
1. Go to System Administrator -> Configuration -> Designers -> Menu Designer.
a. Ctrl-Shift-F12 to enter config mode and be able to edit or add a View.
b. Go to the Edit menu and select the non-ADMIN view that you want to modify.
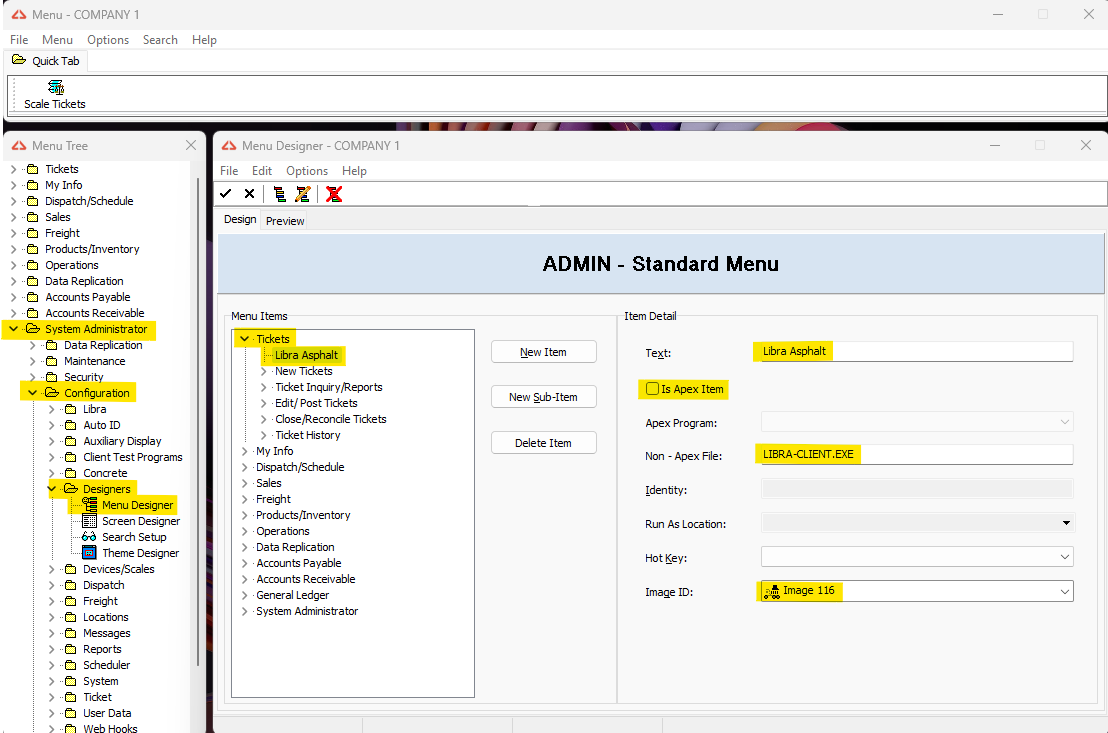
2. Add the Libra app under tickets.
a. Click on the Tickets folder.
b. Hit the New Sub-Item button.
c. Make sure the yellow fields are the same as in the picture; you can change the Text, which will be the name of the Libra app.
d. Click on the check symbol or hit (F2) to save the changes.
(The LIBRA-CLIENT.EXE can be found in C:\Libra\Deploy\Client).
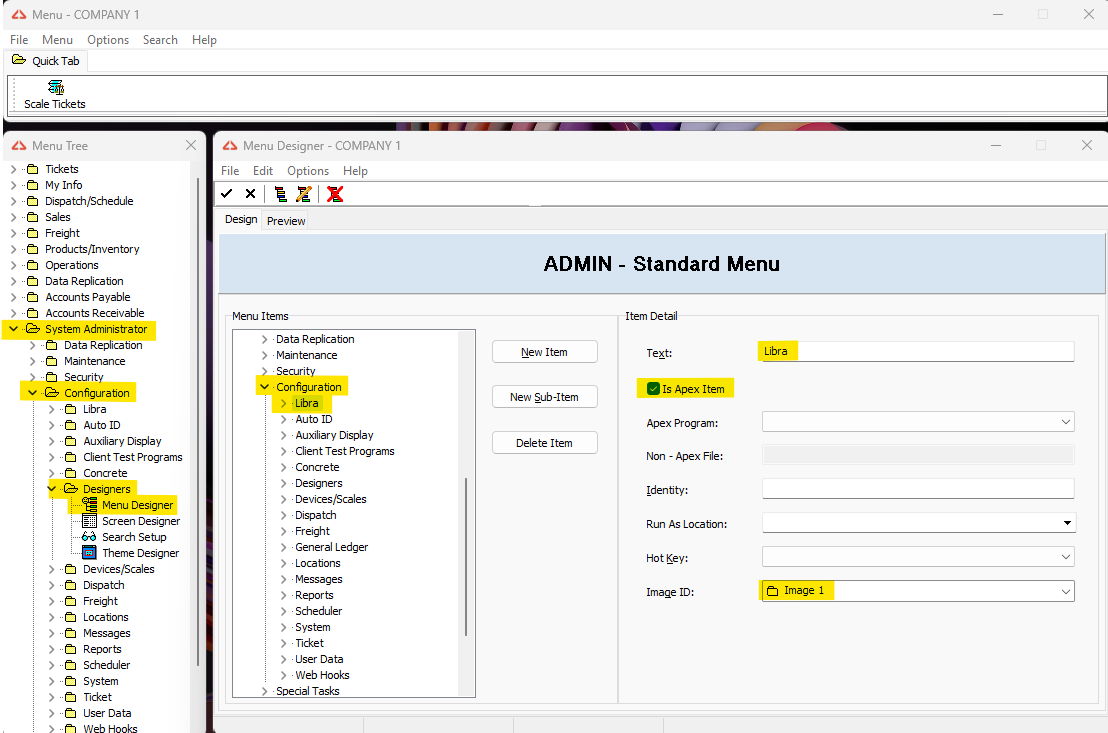
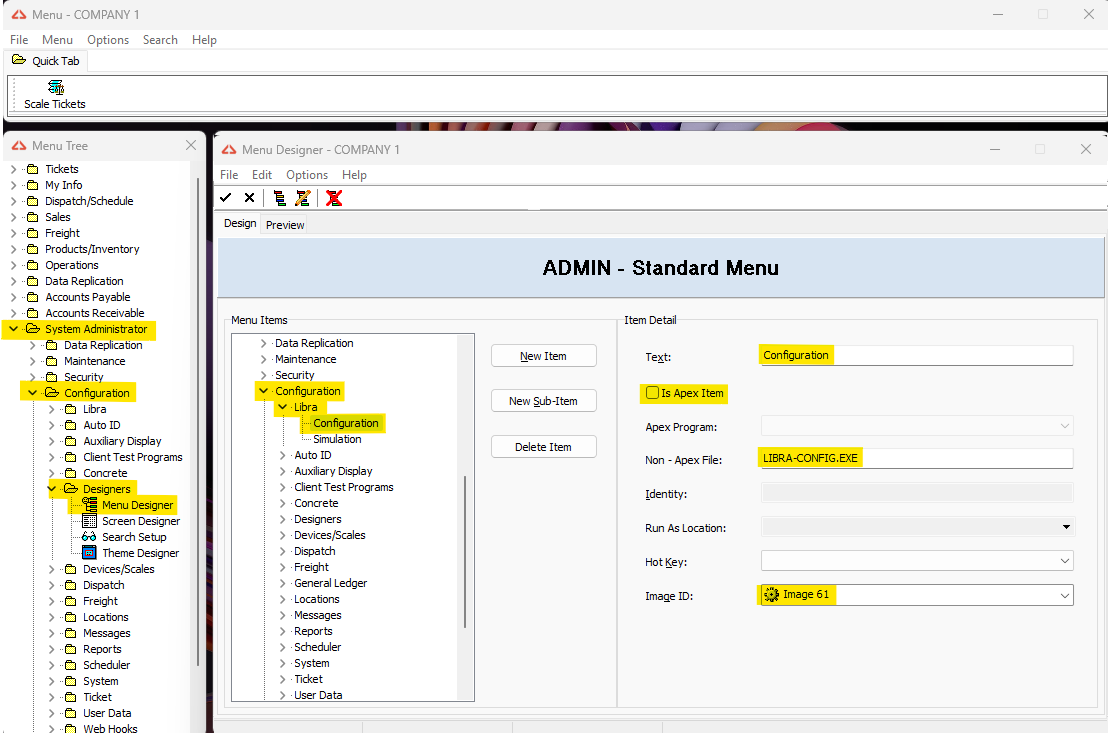
3. Add the Libra folder under Configuration.
a. Click on the Configuration folder.
b. Hit the New Sub-Item button.
c. Make sure the yellow fields are the same as in the picture.
d. Click on the check symbol or hit (F2) to save the changes.
4. Add the Libra Connected Config Utility.
a. Click on the Libra folder just created under Configuration.
b. Hit the New Sub-Item button.
c. Make sure the yellow fields are the same as in the picture.
d. Click on the check symbol or hit (F2) to save the changes.
(The LIBRA-CONFIG.EXE can be found in C:\Libra\Deploy\ConfigUtility).
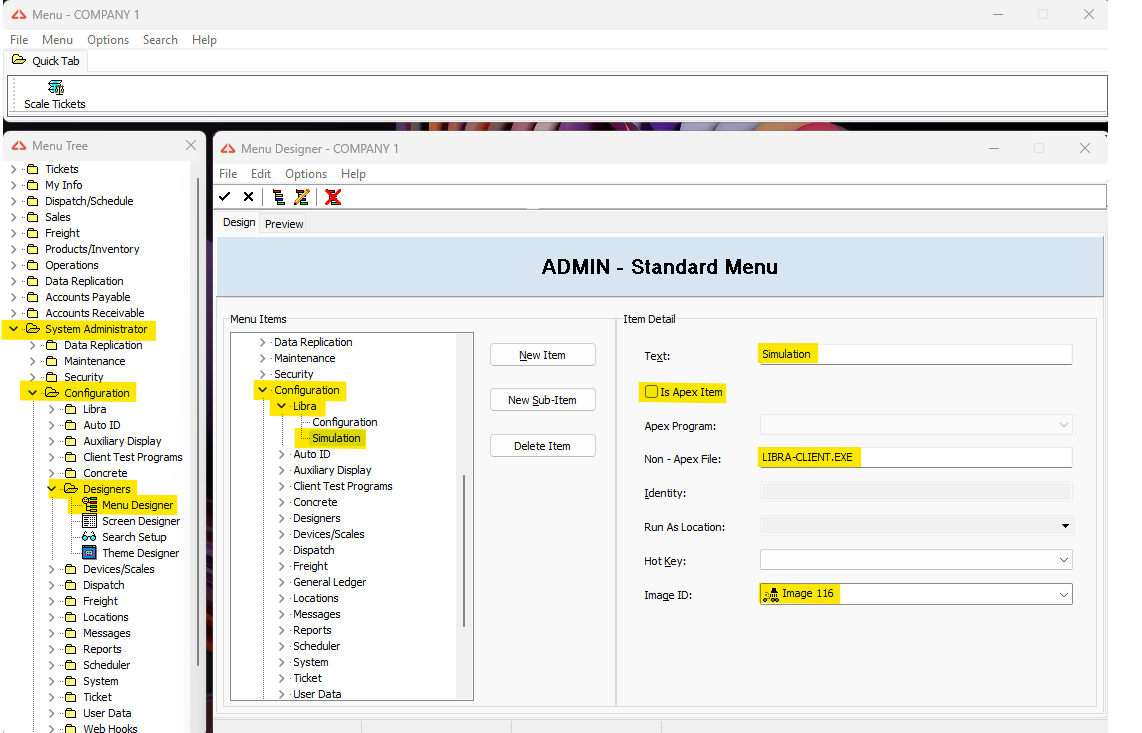
5. Add the Libra Connected Simulator.
a. Click on the Libra folder just created under Configuration.
b. Hit the New Sub-Item button.
c. Make sure the yellow fields are the same as in the picture.
d. Click on the check symbol or hit (F2) to save the changes.
(The LIBRA-CLIENT.EXE can be found in C:\Libra\Deploy\Client).
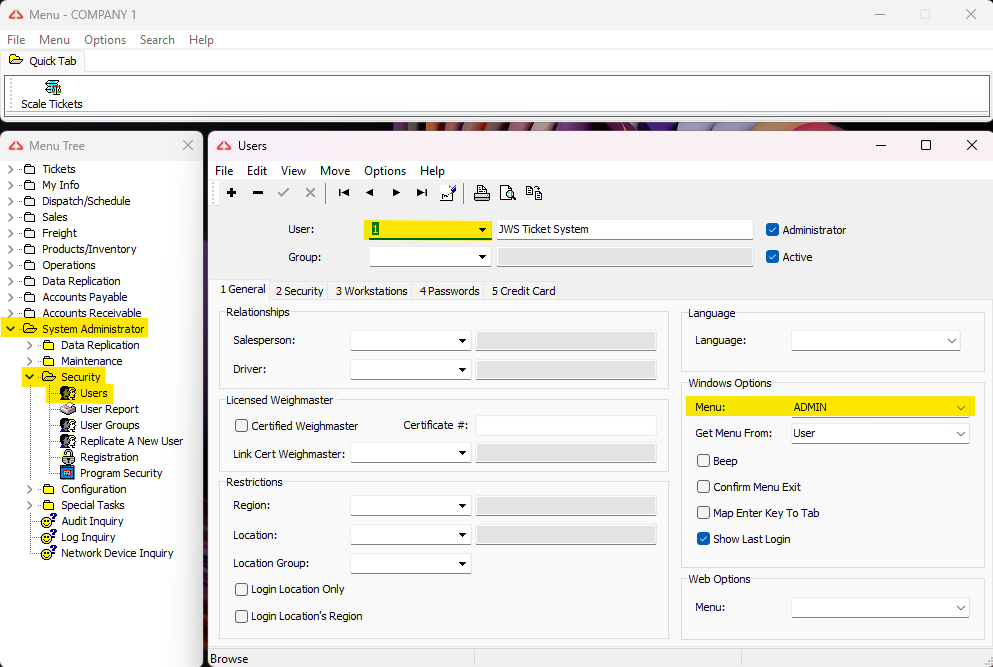
6. Assign the Libra Connected Menu to the users.
a. Go to System Administrator -> Security -> Users.
b. Select the user you want to add the edited Menu.
c. Choose a menu that you would like to apply to your user.
d. Click on the check symbol or hit (F2) to save the changes.